DFT Gage Adjustment
- 18 August 2016
- Posted by: Stm Coatech
- Category: Educational Articles

Coating thickness shall be measured in accordance with SSPC: The Society for Protective Coatings Paint Application Standard No. 2 (SSPC-PA 2) is a simple enough statement, yet this common specification requirement is often misinterpreted or regarded as a document that simply states how to measure the dry film thickness (DFT) of coatings, something we already profess to know how to do. Yet the requirements of SSPC-PA 2 regarding gage calibration, verification of gage accuracy and adjustment procedures, the number of measurements to obtain, and the tolerance of the measurements are complex and should be fully understood by the specification writer before invoking PA 2 in a contract.
Step 1: Instrument CalibrationOn more than one occasion, I have heard the question, “When did SSPC-PA 2 and dry film thickness measurement become so complicated?” In fact, when you take a close look, measuring DFT isn’t that complex. We have allowed it to become more technologically complex while making the data easier to analyze. We can gather hundreds of gage readings in a relatively short time; batch the measurements; print the data or upload it to a computer for graphing; report the highest, the lowest, the mean, and standard deviation of the collected data; incorporate digital images of the structure or coated area; and even program the gage to produce an audible signal if a spot measurement is outside of the tolerance range. I am no doubt leaving out other bells and whistles, but my point is that while we are able to do a lot with the readings obtained, measuring DFT involves four or five basic steps.
Step 2: Verification of Gage Accuracy on Certified Coated Standards or Certified Shims
Step 3: Base Metal Reading Acquisition or Gage Adjustment (using certified or measured shims)
Step 4: Measurement of Coating Thickness
Step 5: Correction for Base Metal Reading (if acquired).
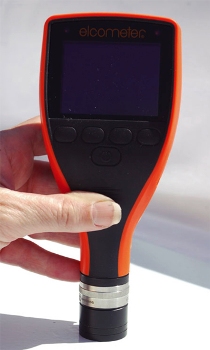
TYPE 1: PULL-OFF GAUGESIn Type 1 pull-off gauges a permanent magnet is brought into direct contact with the coated surface. The force necessary to pull the magnet from the surface is measured and interpreted as the coating thickness value on a scale or display on the gauge. The magnetic force holding the magnet to the surface varies inversely as a non-linear function of the distance between magnet and steel, i.e., the thickness of the dry coating. Less force is required to remove the magnet from a thick coating.TYPE 2: ELECTRONIC GAUGESA Type 2 electronic gauge uses electronic circuitry to convert a reference signal into coating thickness. These gages are more popular than Type 1 gages. They are typically regarded to be faster, more accurate, and easier to use.
Verifying the Accuracy of Type 1 Gages
The accuracy of Type 1 (magnetic pull-off) gages is verified by placing the gage probe onto a certified coated thickness standard. A one-point or two-point accuracy verification procedure can be performed; typically, the two-point verification provides greater accuracy. If a one-point verification procedure is adopted, the coated standard should be selected based on the intended range of use. For example, if the intended use is between 4 and 6 mils, then a five-mil coated standard is appropriate. Using the same example, if a two-point verification procedure is adopted, then a two-mil and an eight-mil set of coated standards (slightly below and above the intended range of use) is appropriate.
The final step in the process is to obtain a set of base metal readings (BMRs) to compensate for substrate characteristics including (but not limited to) substrate metallurgy, geometry, thickness/thinness, and roughness. These readings represent the effect of the substrate conditions on the coating thickness measurement device. SSPC-PA 2 states that a minimum of 10 (arbitrarily spaced) locations should be measured (one reading per location) and then averaged. This average BMR is then deducted from subsequent coating thickness measurements to remove any effect of the base metal surface and its conditions.
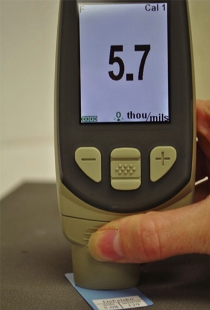
Because Type 1 gages cannot be adjusted, some gage operators believed that a “correction value” could be applied to the coating thickness readings to compensate for the inaccuracy of the gage. For example, if a gage reading was 5.7 mils on a five-mil coated standard, a 0.7-mil “correction value” could be deducted (by the gage operator) from subsequent coating thickness measurements. However, because Type 1 gages are non-linear, one cannot assume a linear (mil-for-mil) correction value across the full range of the gage. While the gage may be out of tolerance by 0.7 mils at 5 mils, it may be out of tolerance by more or less than 0.7 mils at a different thickness. Accordingly, SSPC-PA 2 states that the practice of using a linear correction value is not appropriate.
However, Note 6 in the standard states, “A correction curve can be prepared by plotting the actual gage readings against the stated values on the (coated) test blocks (standards). Subsequent coating thickness measurements can be “corrected” by plotting the measurements along the correction curve. The correction curve may or may not cover the full range of the gage, but should cover the intended range of use. The Base Metal Readings (BMR) described in 6.1 may also need to be plotted on the correction curve.”
This requirement makes Type 1 gages very difficult to use. While some gage operators may simply subtract a fixed amount (for example, 0.5 mils) from any reading, such a practice is not in compliance with SSPC-PA 2.
Verifying the Accuracy of Type 2 Gages
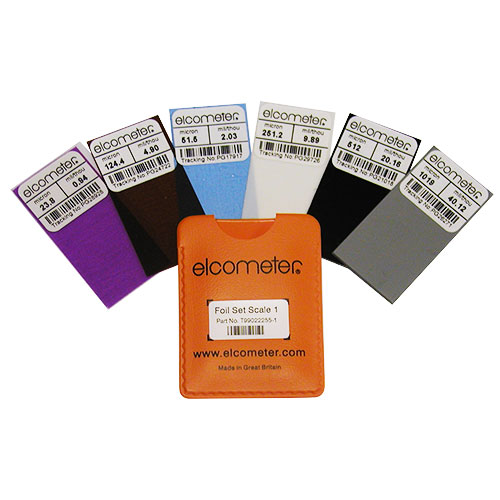
The accuracy of Type 2 (electronic) gages can be verified by placing the gage probe onto a certified coated thickness standard (described for Type 1 gages) or certified shims. The certified shim should be placed onto a smooth, uncoated metal surface to remove any effect of the surface roughness during this process. A one-point or two-point accuracy verification procedure can be performed (as described earlier for Type 1 gages).
The final step in the process is to adjust the gage on the surface to which the coating will be applied. Adjustment is accomplished by placing a certified or measured shim (or shims) onto the prepared, uncoated metal surface and adjusting the gage (when feasible) to compensate for substrate characteristics including (but not limited to) substrate metallurgy, geometry, thickness/thinness, and roughness. The gage reading is adjusted to match the thickness of the shim, which effectively removes any influence from the underlying surface.
This step sounds reasonably straightforward but poses several hidden challenges. First, once the surface is coated (for example, with a primer), an uncoated surface may no longer be available for subsequent gage adjustments, so the user may want to have a similar uncoated surface prepared and reserved for future gage adjustments on a given project. Naturally, this surface must be representative of the metallurgy, geometry, thickness/thinness, and roughness of the actual surface, which can be a challenging requirement.
Second, some Type 2 gages cannot be adjusted. In such cases, the user will need to obtain BMRs from the prepared, uncoated substrate (described earlier for Type 1 gages). While many Type 2 (electronic) gages have a “zero-set” function, the gages should never be adjusted to zero unless the surface is smooth.
REFERANCES:
1. KTA University, Measuring Dry Film Coating Thickness According to SSPC-PA 2, data of access: 16 August 2016, https://ktauniversity.com/dry-film-coating-thickness-sspc-pa-2/
2. Paint Square, Calibration Terms for Thickness Gauges, data of access: 16 August 2016, http://www.paintsquare.com/library/articles/metalfin_measurement_terms2.pdf


